
Adding a Background!🚀
Spice up your boss's visuals! While we offer a selection of ready-made backgrounds, you can now create your own custom backgrounds using multiple images and layering them for unique effects. This tutorial will guide you through the process.
Custom Backgrounds
In the main editor menu, choose "Custom" from the background dropdown. This activates the custom background editor, accessible via the "Custom" button. Remember, your custom creations will only be active when "Custom" is selected in the main menu.
⚠️ File
When speaking about background files we mean the ones you add via the File menu and set as type background
The Custom Background Editor lets you combine multiple image files or URLs, layering them to build complex scenes. You can even use animated sprites you've created!
🔹 Note
Custom backgrounds will only appear if you select the "Custom" background option!
Adding a Background Layer
Think of each background as a layer. You can add multiple layers to create depth and interesting visual combinations. To add a new layer, click "Add" in the Custom Background Editor.
Basic Layer Parameters
Each background layer has these basic settings:
- Name: Give your layer a descriptive name (e.g., "Forest Layer," "Rain Effect"). This helps you organize your layers and can be used to control their visibility.
- Enabled: Check this box to make the background visible from the start.
- 🔄 Variable Condition: Control the layer's visibility using game variables. This lets you dynamically change backgrounds during gameplay (e.g., a background appears only after a certain event).
- Draw Layer (Z-Depth): This is crucial for layering! Lower numbers are drawn *behind* higher numbers. Experiment to get the desired depth effect. For example, a mountain background should have a lower draw layer than a foreground tree.
🔄 Variables
You want a background to only appear when phase 2 starts? Use a variable
- Set variable Name to "phase".
- Set variable Valueto "2"
- Set variable Comparator to "Greater than or equal".
- In your attacks, add a behavior that updates the variable "phase" by setting it to "2"
For more information go here
Background Types
There are several types of background you can create:
Background Types
| Type | Use Case | Example |
|---|---|---|
| Existing Background | Use built-in backgrounds | Pre-made effects like Rain or Fire |
| Custom Image | Use your own image or URL | Upload a cityscape or animated sky |
| Particle Emitter | Adds particle effects | Snow, fireflies, fog |
| Texture Shape | Fills a shape with a texture | Scrolling brick walls, glowing portals |
| Sprite Part | Uses animated sprites | Moving torches, spinning gears |
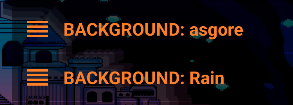
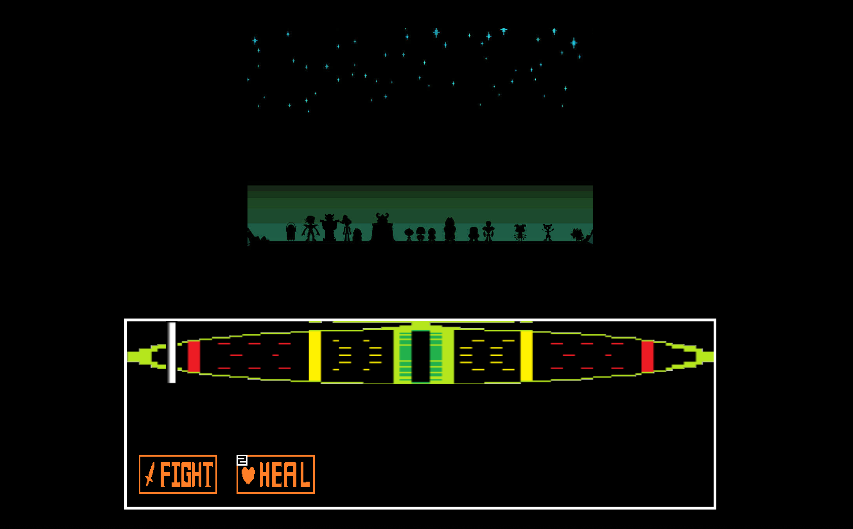
Existing Background
Choose a pre-made background and adjust its Draw Layer to position it within your custom background.
You can add multiple backgrounds at once to add them together into one, here is one example with asgore and rain
Custom Image
Use images you've uploaded in the "File" menu and marked as "Background." You can also use static sprite parts.
Parameters
- Custom Background: Select your image or sprite part.
- Stretch to fill screen: Stretches the image to cover the entire screen.
- Scale: Adjust the image size.
- X/Y Position: Position the image on the screen.

Stretched
Not stretched
Particle Emitter
Create cool particle effects! These are similar to the particle effects you can use in attacks.
⚠️Important: Particle emitters can impact performance, so use them sparingly.
Parameters
- Particle parameters: Customize the look and behavior of the particles.
- X/Y Position: The starting point for the particle emission.
🎨 Try This!
Want to create the above particles??
- Add a new background
- Set Type to "Particle emitter"
- Set "Speed" to "1"
- Set "Speed random" to "2"
- Set "Direction" to "random"
- Set "Color" to "white"
- Set "Change to color" to "purple"
- Set "Change in seconds" to "1"
- Set "Change in seconds random" to "1"
- Set "Number of particles" to "3"
- Set "Max life" to "50"
- Set "Fade duration" to "65"
- Set "Size" to "2"
- Set "Size random" to "2"
- Set position
- Save and make sure that it is enabled
- Go back and test your boss background
- Experiment with different settings to create other effects!
Texture Shape
Create shapes (rectangles or circles) and fill them with textures. This is a more advanced technique, but it can create some really unique visuals.
Parameters
- Texture: Choose your image or sprite part.
- Tile Mode X/Y: How the texture is repeated within the shape (see below).
- Scale texture to shape X/Y: Stretches the texture to fit the shape.
- Texture Speed/Direction: Animate the texture within the shape.
- Shape: Choose between a circle or rectangle.
- Dimensions (Width/Height/Radius): Set the size of the shape.
- X/Y Position: Position the shape on the screen.
Tile Mode
Tile mode controls how the texture repeats within the shape:
- Repeat: The texture tiles seamlessly.
- Clamp: The texture is stretched to fill the shape.
- Mirrored: The texture tiles, mirroring each repetition.
🎨 Try This!
Want to create the sun effect?
- Download this lava texture

- Import the lava image as a "File" with "background" as type
- Add a new background and set "Texture Shape" as the type
- Select the added "Lava" image as a texture
- Set tile mode x to "Repeat"
- Set tile mode y to "Mirror"
- Set scale texture to shape x to "enabled"
- Set scale texture to shape y to "disabled"
- Set texture speed to "30"
- Set texture direction to "0"
- Set texture shape to "circle"
- Set Radius to "40"
- Set position
- Save and make sure that it is enabled
- Go back and test your boss background
- Experiment with different settings to create other effects!
Clamp Tip: Clamp can be tricky with movement, so experiment to see what works best.
Sprite Part
Use animated sprites as background elements! This is perfect for things like flickering torches, rotating gears, or other dynamic details.
Rotating shield
To use this you create a Sprite part from the main menu by using a sprite sheet, setting coordinates and then adding animations etc.
🎨 Try This!
Want to create a cool layered background? Follow these steps:
- Download the shield image
- Add the file in the "Files" as a sprite
- In the main menu go down to sprite and press the advanced button
- Create a new part
- Select the sprite sheet you just added to files
- Name it Shield
- Set start X to "0"
- Set start Y to "0"
- Set width to "78"
- Set height to "78"
- Go down and enable animation set
- Set animation parts to "4"
- Set animation parts row to "1"
- Set frames per update to "5.0"
- Scroll down and enable rotation
- Set rotation speed to to "200"
- Save and go back to the custom background
- Add a new background
- Set type to "Sprite part"
- Select the added "Shield" sprite part
- Set position
- Save and make sure that it is enabled
- Go back and test your boss background
Experiment
Now that you know what you can create I recommend that you try things out and experiment!
Try combining images with a particle system
Not added yet

Background example boss
Showcases how to create a custom background with several examples